I will start by writing a brief description about Server Core and then we will get deeper with some command-line stuff.
Now what is Server Core?
Well, Server Core is a minimal server installation option for computers running on the Windows Server 2008 operating system or later. Server Core provides a low-maintenance server environment with limited functionality.
Well, Server Core is a minimal server installation option for computers running on the Windows Server 2008 operating system or later. Server Core provides a low-maintenance server environment with limited functionality.
A server running a Server Core installation supports the following server roles:
- Active Directory Domain Services (AD DS)
- Active Directory Certificate Services (AD CS)
- Active Directory Lightweight Directory Services (AD LDS)
- DHCP Server
- DNS Server
- File Services
- Print Services
- Streaming Media Services
- Internet Information Services (IIS)
- Hyper-V
A Server Core installation does not include full graphical user interface meaning that all the configuration is being done using the command-line. Once you have configured the server, you can manage it locally at a command prompt or remotely using a Terminal Server connection. You can also manage the server remotely using the Microsoft Management Console (MMC) or command-line tools that support remote use. In R2, PowerShell can also be used either locally or remotely.
Now that you have a better understanding of that Windows 2008 Server Core edition, we will continue with a basic installation and configuration.
Step 1: Boot using a Windows 2008 / R2 media kit and select one of the Core versions as shown in the picture bellow: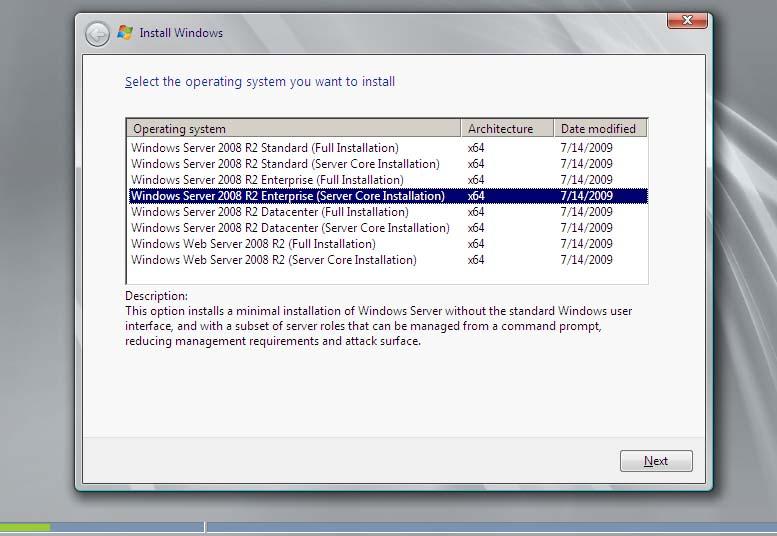
Step 2: After the setup is finished Windows will boot up in a non-graphical interface as shown in the following image: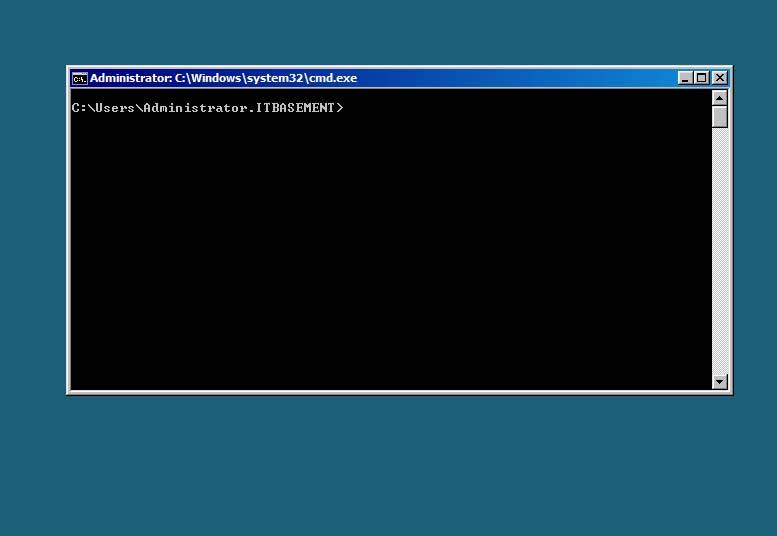
OK, now that the Windows installation is over we can write some interesting commands on the console!
First of all we have to connect to the internet by configuring an IP address:
netsh interface ipv4 set address name=”Local Area Connection” source=static address=192.168.0.5 mask=255.255.255.0 gateway=192.168.0.1
netsh interface ipv4 add dnsserver name=”Local Area Connection” address=127.0.0.1 index=1
netsh interface ipv4 add dnsserver name=”Local Area Connection” address=192.168.0.2 (DNS Server)
Then we have to change the server name. This can be done by the following command:
netdom renamecomputer WIN-JS8DELN0O6D /newname:ADcoreOLD /UserO:administrator /PasswordO:* /ReBoot:60
After the system boots up we will join him to a domain controller using the next command:
netdom join ADcore /Domain:itbasement.net /OU:ou=itBasement,dc=itbasement,dc=net /UserD:administrator /PasswordD:*
And reboot again!
shutdown /r /t 0


0 comments:
Post a Comment